
Thinkboard GACORE is the first fine-pitch FPGA board that I’ve designed, I will explain step by step about the design process of this board, let’s get started!
#1 – The Reason
GACORE stands for FPGA at the CORE, or in Indonesian slang means keren (cool), hebat (great), mantap (excellent), it using iCE40LP8K-CM81 FPGA at the core, a 81-ball ucBGA with 0.4mm pitch. It’s a very not the best part for fanout-learner like to begin with. But I’m curious enough to start the design, then I’ll do it anyway.
I use TinyFPGA-BX board as my reference during designing this board
#2 – The Process
I’ve documented the design process through this video
I do the assembly and reflow manually by hand as shown in the timelapse video below
#3 – The Result
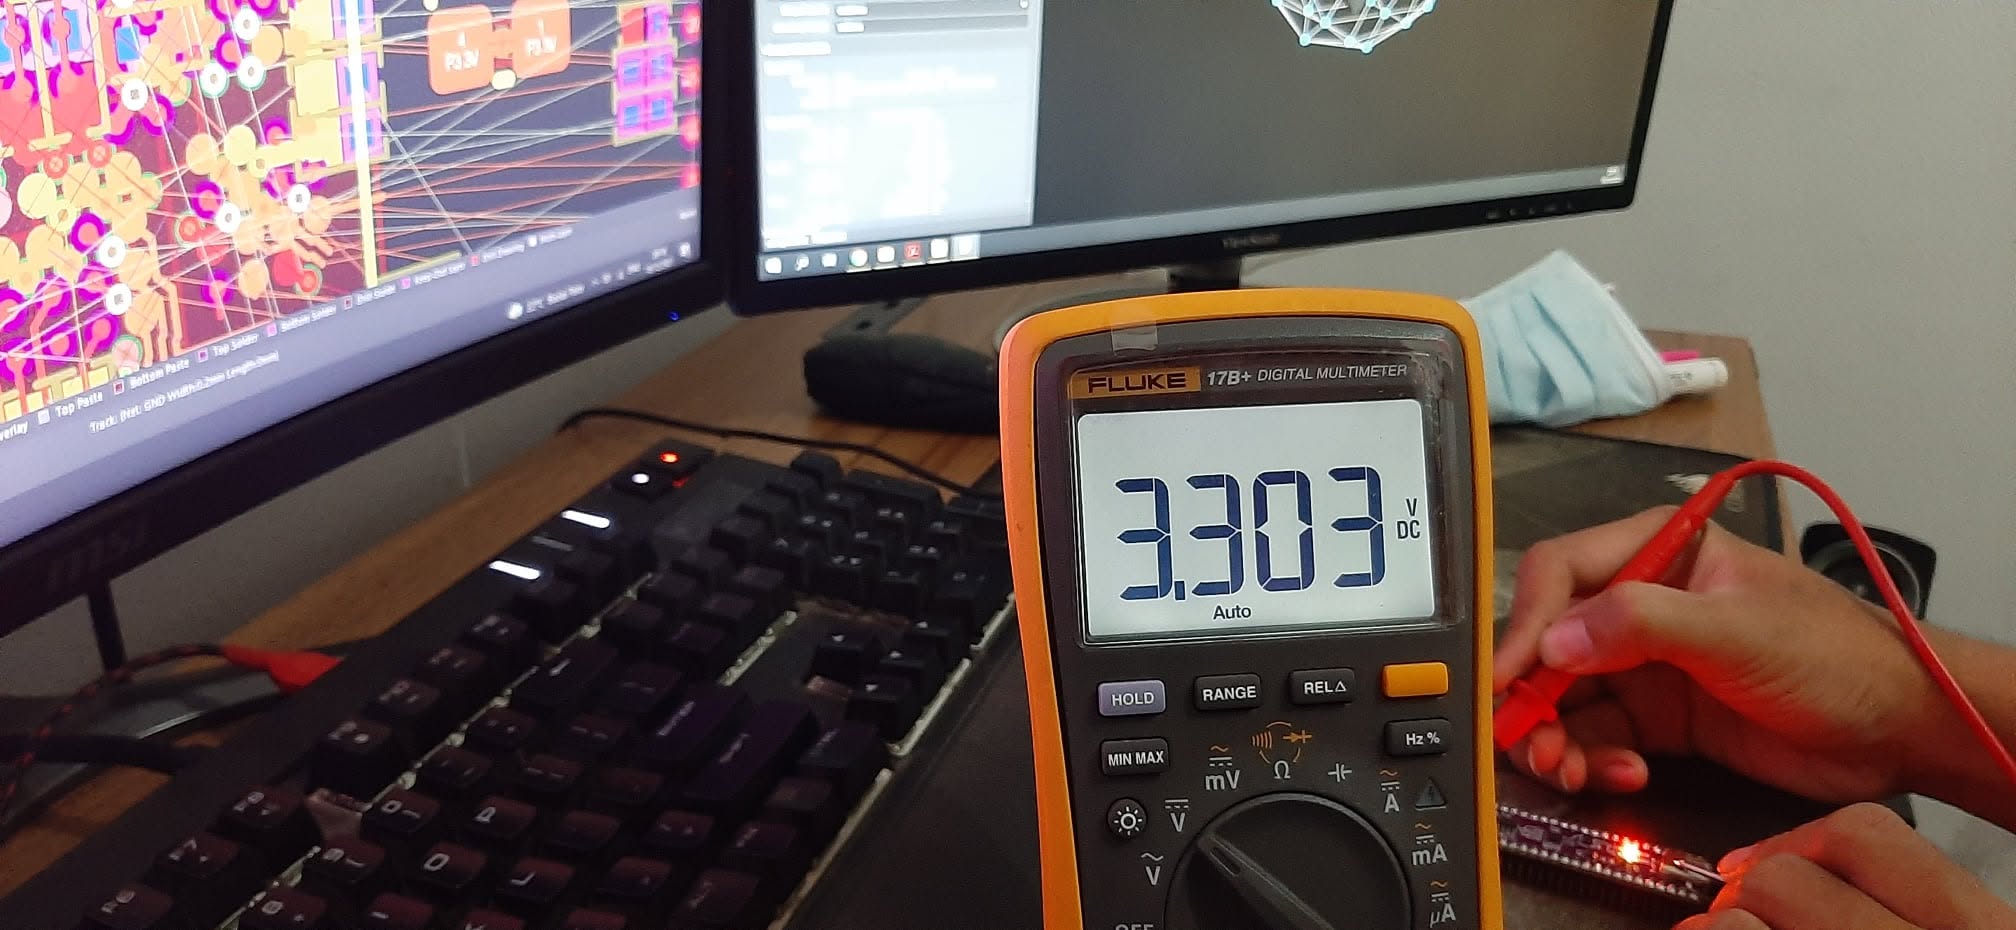
At the time when this board was finished, It’s time to bring-up the board, all the voltage rails was correct but unfortunately I don’t have any Lattice Emulator in my shelf. It turns out that I need to wait couple of weeks more to receive the emulator from Aliexpress (before it’s banned by Indonesian government). While waiting, I’m trying to flash the FPGA using an arduino board, but I have no success.
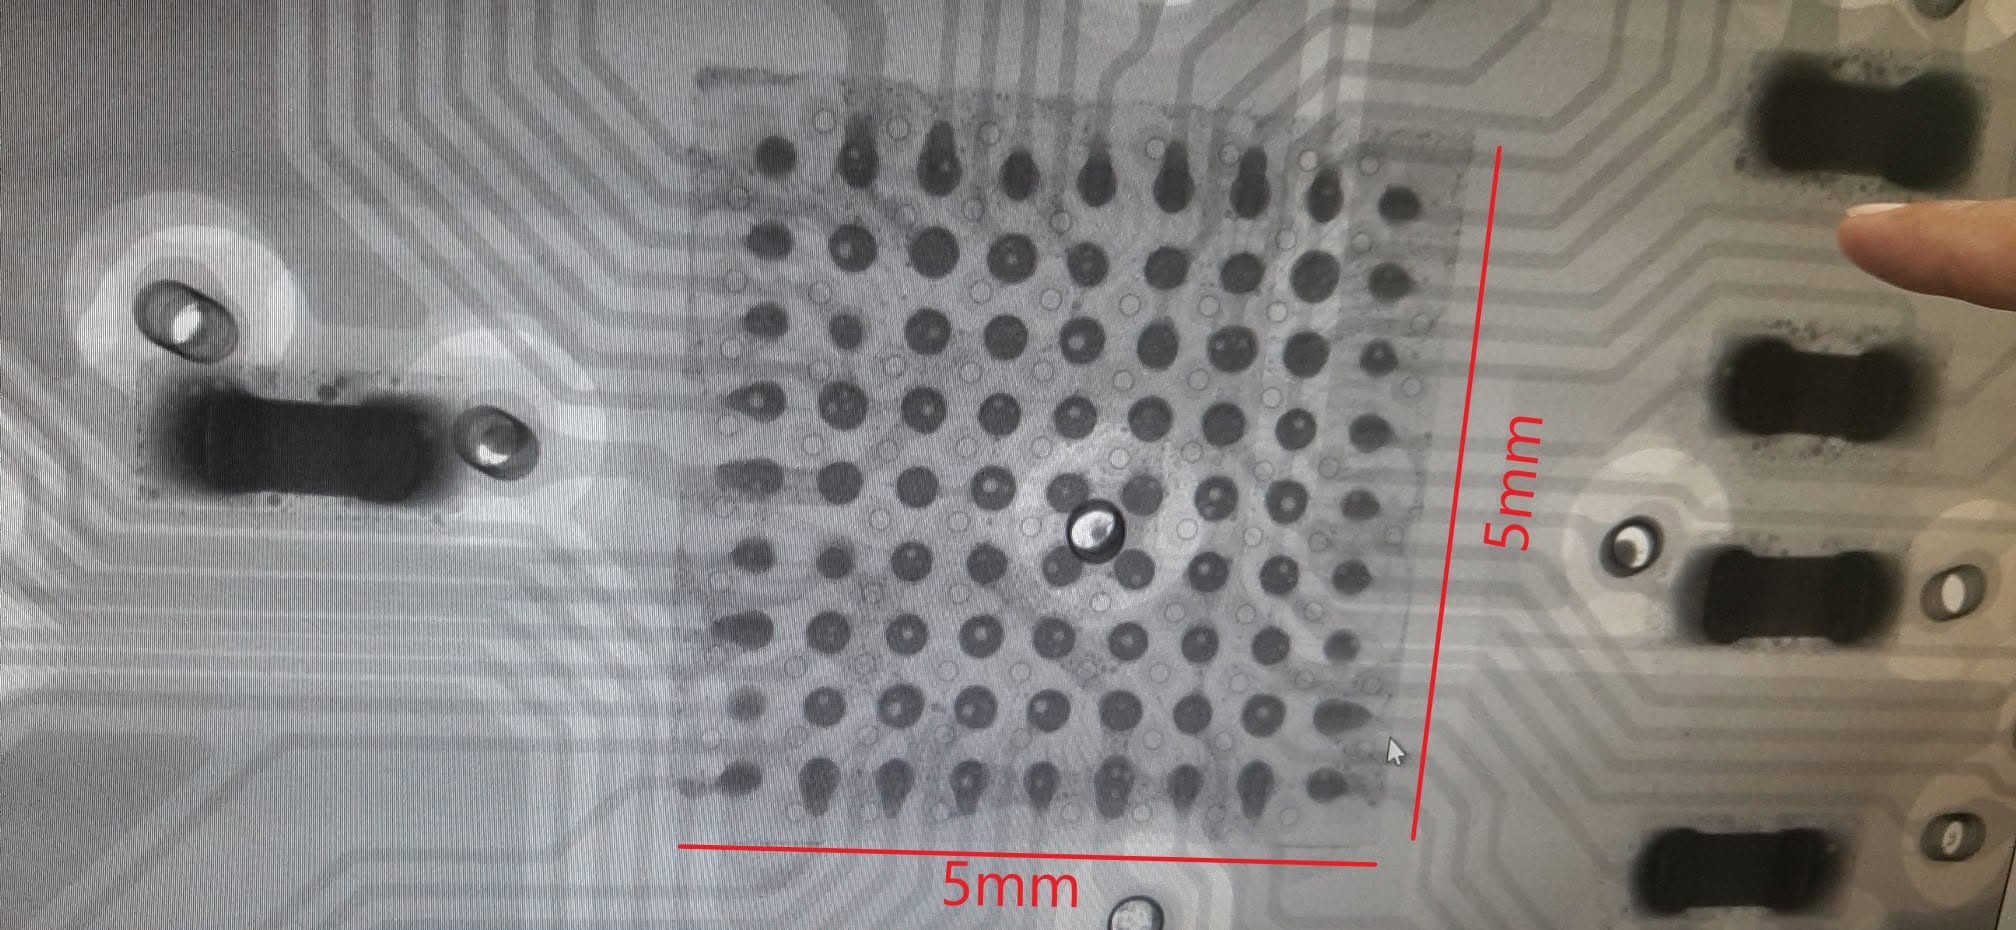
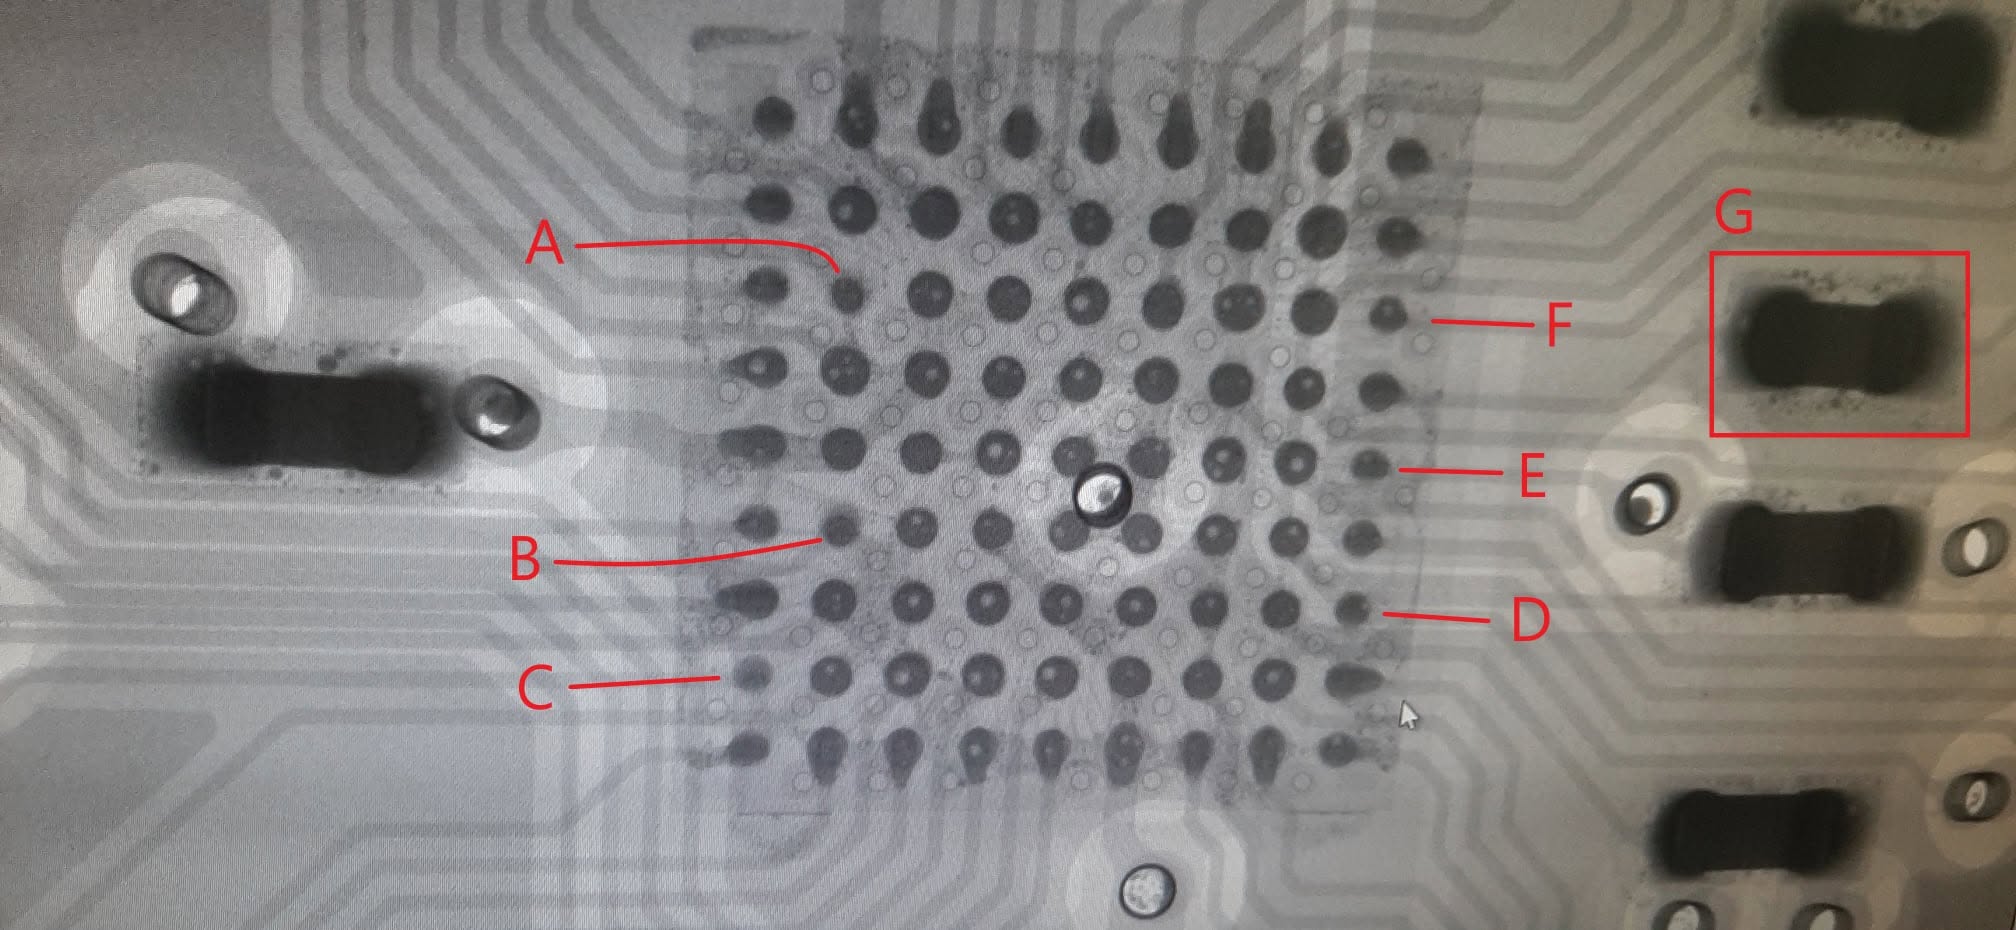
I also tried to inspect the soldering result under a x-ray machine, it turn out that the solder under the BGA part has a problem, it might be causes another problem.
More contents will be updated later
Leave a Reply